Quick Start Guide
Before we dive into How To Tag, you need to download the app from the Apple App Store or Google Play Store. Open the app, create your account and log in! Now you're ready to start tagging and to help others find new, accessible places!
Pick a venue
The first step is to select the venue you want to tag. Pick a venue from the map by clicking on a grey or orange Sociability pin.
A grey pin means that venue has not been tagged yet (and has no accessibility information recorded) whilst an orange pin means that venue has been tagged and has either partial or complete accessibility information recorded.
Start the tagging process
Once you've picked a venue, click the 'Add' button on the venue's profile page to start tagging.
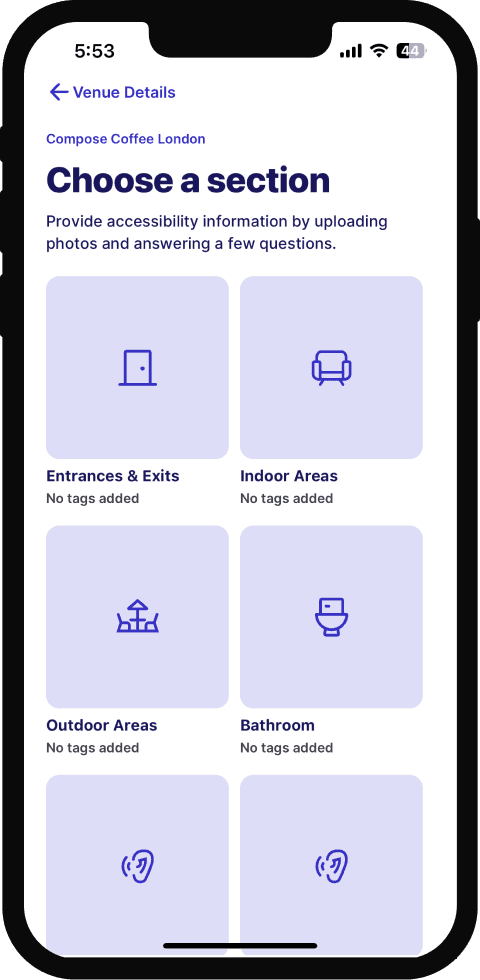
Pick one area to start with
Every venue will have different areas within it – such as an entrance, interior space, bathroom and more. For different areas, we have created different sets of questions – each designed to gather the relevant accessibility details for that area type. Pick one category to begin with – you can choose the area you're most familiar with, or follow our lead and start with Entrances & Exits!
The Tagging Flow
It's time to start tagging! Our Tagging Flow has three key parts:
Upload images
First, you will need to upload images that show the venue's accessibility features. You can take a photo on the spot, through the app, or add photos that you've taken earlier from your phone's camera roll. Try to add enough photos to show all the key accessibility features in the area that you're tagging.
Tip: Take photos of everything that is mentioned in the tags. You can upload up to 10 images per area.

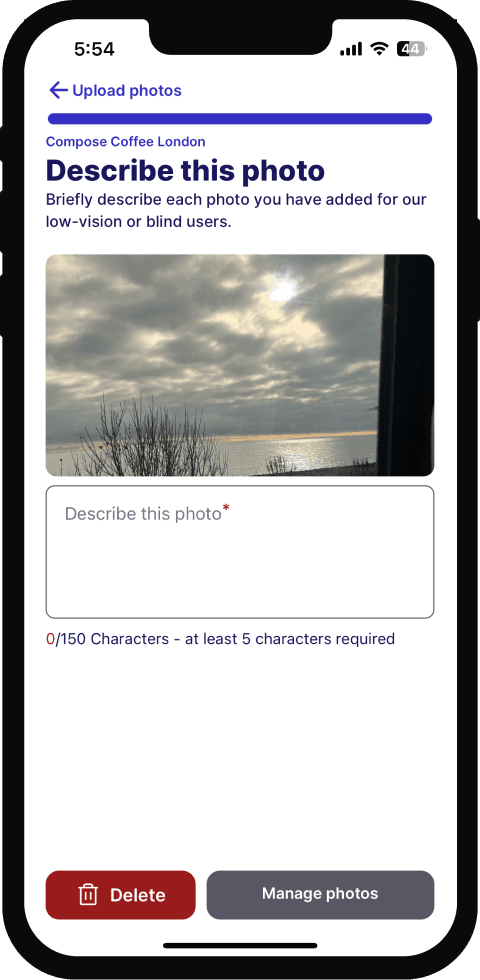
2. Add Alt-text to describe your images
Every image you upload to Sociability needs a brief description. This is so that our visually impaired and blind users can understand what to expect as well. In fewer than 150 characters, describe what the photo shows – including any visible accessible features and noting where in the venue you took the photo from. Alt-text is really important to ensure that Sociability is as accessible to our users as possible.
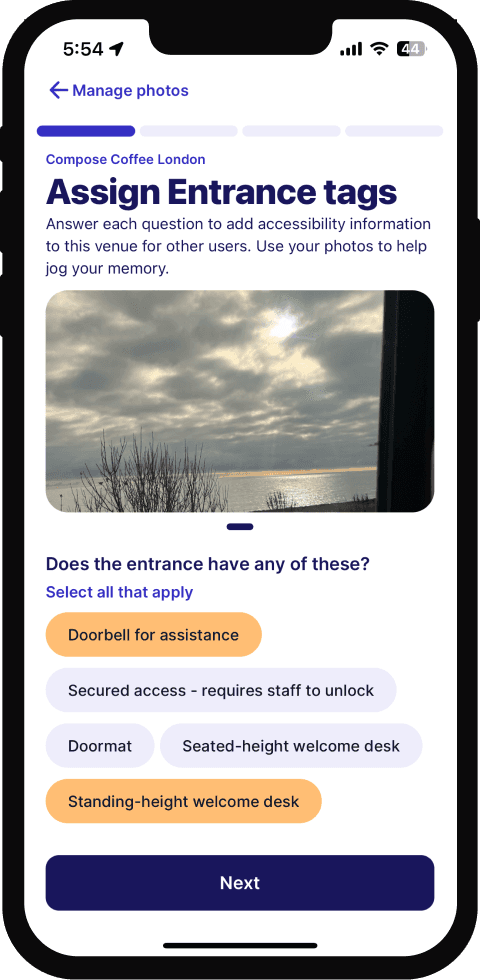
3. Assign tags
The final step is to answer a series of questions about the accessibility features in the area that you are tagging. These questions have been designed to capture all the important elements of a venue's accessibility. As you're tagging, feel free to review the images you just uploaded in the carousel at the top of the page – this way, you can double-check that you’ve added all of the key accessibility features.
Saving your tags
After you've uploaded images, added alt-text, and answered all relevant questions – you're done! Click Finish to save your tags and mark the area as complete. You can now start tagging another area, or finish your tagging session for the moment. Thank you so much contributing to Sociability!
Enhancing the App with Your Tags
Every venue you tag makes Sociability a more useful tool, and empower more users in our growing community. By sharing your experience directly with the Sociability community, you're giving other users more chances to find their new favourite accessible place!